
| Participant | Time Taken |
| Askar | 3:38.52 |
| Lauren | 2:59.72 |
| Matt | 1:50.18 |
| Krystin | 1:35.63 |
| Steve | 1:17.88 |
| Aimin | 1:05.30 |
| Dave | 0:57.43 |
| AMH55 | 0:29.54 |
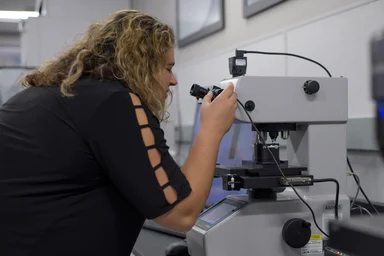
Already, the AMH55 has a clear advantage over the human participants: it is nearly twice as fast as the fastest human in our test, and more than 7 times faster than the slowest! While human speed can be improved with practice, Dave has over a decade of experience working hardness testers. There’s not much more room for improvement!
Comparing the measurements of all of the participants led to some interesting findings.

Some of the participants were consistently low, while others were consistently high. However, only the AMH55 was consistently within 0.5 µm of the actual verified value. In fact, the average range of readings for diagonals across a single indent was 1.67 µm for the humans, but only about 0.1 µm for the AMH55. 1.67 µm may seem small, but it can be a significant difference in a Vickers hardness result, and in this case represented a swing of up to 50 HV.
This variation in diagonal measurements led to variation in the hardness result, and it was precisely this variation that the AMH55 does not have to contend with. Throughout the experiment, the humans made various complaints, from the age of their eyes to the discomfort from trying to fit themselves to the location of the eyepiece. We tried to minimize some variation by having only one person, Dave, zero out the instrument each time, but even that act can introduce sources of error. Other human sources of error can include:
- Focus: If the indent is not perfectly in focus, there may be some difficulty finding the corners of the indent
- Eyesight: Some people don’t see as well as others, and eyes may become fatigued after prolonged hardness testing. Several of our testers commented about eyestrain after just these three indents
- Alignment: When rotating the ocular eyepiece for the second diagonal, if the eyepiece isn’t exactly at 90° from the first measurement, this means the diagonal is read at an angle, which introduces variation
- Human Factors: Humans can be bored, tired, anxious, and vary in experience etc., leading to “sloppier” readings
While most humans involved in this test made perfectly good measurements, that small variation between different readers can lead to different results. Automated hardness testing systems like the AMH55 do not have to account for any of the above sources of error. When combined with the increased speed, the choice becomes simple: If precision is important, automation is the answer.


